 Hey everyone. I was browsing the web and came upon. http://thediyshow.com/2013/07/05/the-barefoot-sandal-challenge/
I couldn't resist taking the challenge. I have always wanted to do a barefoot sandal and have just never gotten around to is so I figured why not. I realized I did not have any beads, shells or charms on hand, just yarn.....so one pair of crochet sandals coming up! 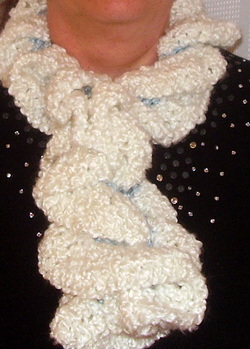 Hello everyone, Millie here. Just wanted to announce that I have a new scarf released for the Scarf of the Month club! Scarves are so much fun to crochet and just as much fun to wear. A good scarf can make an outfit fun, exciting, super stylish or just add a splash of color. My husband is always amazed that I can take a skein of yarn and a crochet hook and finish up with some item like a scarf, blanket, hat, etc. He is a lineal thinker and can’t imagine, even with a pattern to follow, how the creative process works. To me, scarves are the best way to let your creative side loose! Typically scarves are fairly quick to produce, economical as far as yarn usage, and in the end can be worn to show off your skill. The crochet artist can choose to use anywhere from one color to a zillion colors of yarn; one particular stitch, variations of that stitch or a combination of stitches to make the pattern she (or he) envisions in their mind; a scarf can be skinny, wide, short or long, fringed or not – basically there is no limitation on what you might do with a scarf. As a bonus, as they are typically done in a short period (verses weeks for an afghan), so you are quick to get to that sense of satisfaction. I like that. Not every item I make has an interesting story behind it, sometimes I just want to try a new pattern or see how some colors go together. The other day I was outside in my garden and the wind was blowing so hard and the clouds were racing across the sky, pollen was blowing everywhere and leaves, flowers and other little items were bumping from one side of the yard and back to the other. With the wild cherry tree in my yard it sometimes looks like a snow storm! Looking at the fluffy clouds I thought to myself wouldn’t a scarf made of clouds be awesome? So, here is my attempt to crochet a cloud scarf. I hope you like it! http://www.etsy.com/listing/71631458/crochet-cloud-scarf-white-and-blue-and Thanks to everyone for your friendship and support of our art here at 2crochethooks. As usual, any questions, comments or suggestions gladly accepted! Thanks for reading, Millie 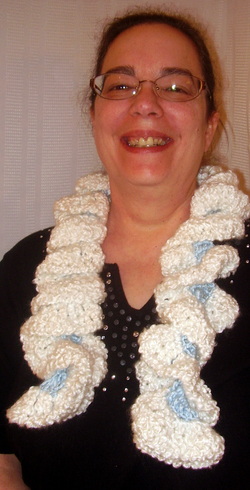 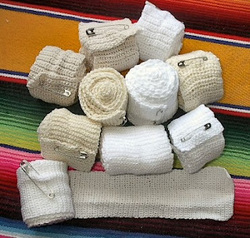 click for pattern click for pattern I found this great website with tons of great info. I am all into being prepared for emergencies of all types and so is this lady. Lots of great info on her site to include the pattern instructions, knit and crochet, for making your own ace bandages!!
View her site for the pattern: http://thepreparedhomemaker.blogspot.com/2010/12/home-made-ace-bandages.html 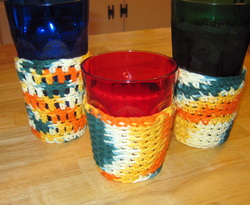 We bought some new glasses the other day and realized fairly quickly the glasses were not insulated so left little rings and droplets of water everywhere. I used the bottle huggies pattern to make some huggies for the glasses. Thought I would share! 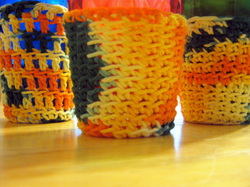 Base row 1: Ch 2, 6 sc in 2nd ch. Sl in first sc Base row 2: Ch 1, 2 sc in same st and each st around, ss in first sc Base row 3: Ch 1, 1sc in same st, 2 sc next, repeat around Base row 4: Ch 1, 1 sc in same st and next st, 2 sc next, repeat around Base row 5: ch 1, sc in next three st and 2 sc in next, repeat around 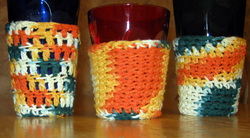 I made three different styles of huggies, they differ when they reach the body of the glass for each start with a sc around in the back loops only. Version 1: continue sc in back loops only until height of glass (I did 11 rows for a total of 12). Version 2: dc each round in back loops only until desired height (I did 6 rows) Version 3: sc in back loops for 4 rows, dc in bl for 2 rows, sc in bl only for the next 4 rows. I did have a problem with the huggies slipping off so I turned the project for the last row to make it tighter. You can also decrease a few times if needed.
If you are a beginning crocheter you can see how easy it is to adjust a pattern to give a whole new look. Use your imagination to design your own pattern today! 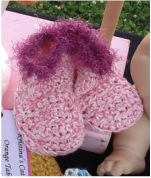 I've gotten a lot of requests for baby booties and socks and such. So far we had not made any because I can never seem to get 2 items to turn out exactly the same. I decided to throw caution to the wind and make a pair or two but had no idea about sizing ect so to be safe I looked up a pattern. Gasp. I know I rarely use patterns as I prefer to make my own but when you make an item for the first time its good to have one.
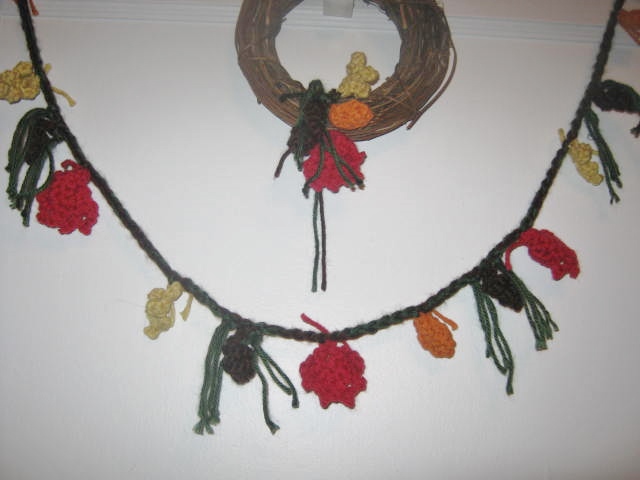
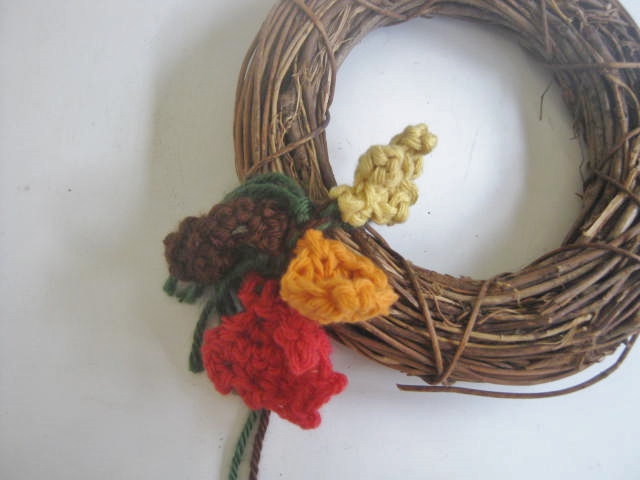
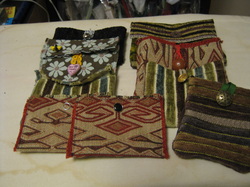 We have mentioned before that we have a TON of scrap cloth thanks to a big sale by our local scrap exchange (scrapexchange.org). I wanted to make a business card or credit card holder so thought I would use some of the pretty scraps. Here are some of my finished creations! (I can never make just one!) 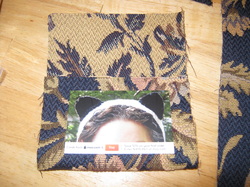 First I took a piece of cloth, my scissors and a business card. I placed the card (this card is from moo.com, check them out!) on the cloth and cut out a rectangle three times as big as the card and about a half inch bigger on each side. This size will give a nice flap to the pouch. For some of the holders I cut the cloth twice the size of the card and a half inch extra around for a smaller pouch that has a top opening. 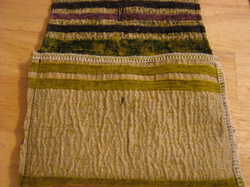 For the three fold bags I folded the bag a bit more than half way, leaving the rest of the cloth for the flap cover. If you want to do a button, place a button hole in the center of the top flap. Here is a three fold sample, fold up about a third or a bit more, sew the side seams, turn the project inside out (or I guess outside in!) Seams are in the inside, leaving a nice clean profile on the outside. 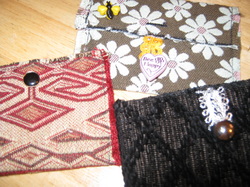 Or sew on the right side of the cloth, a bit in from the edges to give that too cool shabby fringe sides (red and daisy). For this style pick a cloth that fringes nice and go ahead and fuzz it out. (To help fringe items I used a straw, needle and tape - I folded the straw in about half, then I pushed the needed thru the straw at the fold. Next I wrapped the back half of the needle and straw together. Easy to hold and use!) 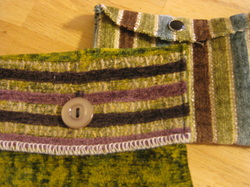 Add snaps, buttons or little wrap ties and any decorations you might desire and you are finished! Quick, fun and eco friendly craft. P.S. I watched a couple videos and read the book but still could not figure out the button hole foot on the sewing machine - if you have any hints or tips pls send!   Hey all! I had a problem; probably you have had it too, where I wanted to make something specific and did not have the appropriate materials on hand. In this case, I wanted to make a fall themed garland or necklace. However, I did not have gold or a good orange on hand so what to do? I had this bright yellow cotton (forgot to take a picture of the yarn so here is where I used it in something else) 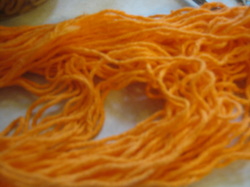 and this beautiful tangerine orange cotton. What if I darkened them a bit? So I decided to give them both a tea bath! 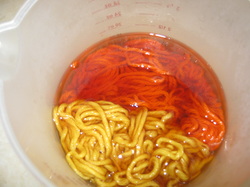 (pic) I first soaked the cotton in water, squeezing them a bit, then put the yarn in warm water with a family sized tea bag. I placed the container in the microwave for two minutes, stirred it around and pressed on the yarn and then microwaved it for another minute. 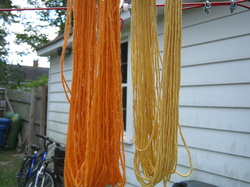 (pic) I didn’t want the tea to dye the yarn too much – I just wanted to dull out the colors a bit - so I only soaked them in the tea bath for about 30 minutes. I removed the yarn and rinsed it out until the water ran clear. Turned out great!! I did try this as well with some white acrylic but after sitting in tea for 12 hours and no change, I added in some coffee, still no change. So guess it only works on natural fibers. Here are the instructions for the necklace I made if you want one of your own: 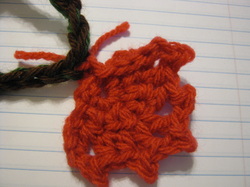 Maple Leaf Pattern Ch2, 5sc in 2nd ch from hook, ch1 and turn (5 sc). 1sc in next 2 ch, 3sc in next, 1sc in next 2 ch, c1 and turn (7 sc). Dc in 1st ch, ch 2 and ss in top of dc, hdc next ch, (hdc, ch 2 and ss in top of hdc) next ch, (dc, ch 2, ss in top of dc) twice in next ch, (hdc ch 2 and ss) in next ch, dc in last ch, finish off. 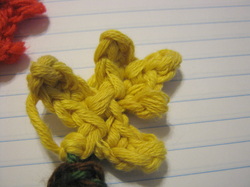 Oak Leaf Chain 6, hdc in 2nd chain from hook and each ch until the end. Ch4 and hdc in 2nd ch and next 2 ch. Ch 2, hdc in 2nd ch (this is the top) ch 4 and hdc in 2nd ch and next 2 ch. Ch5 and hdc in 2nd ch and back to center. Join with initial starting chain and finish off. If you want a stem, add a few chains here. 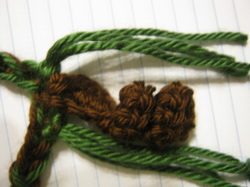 Pine cone: Ch10, 3sc in 2nd ch from hook and each ch back to the end. Done! Really that simple. I also cut 4 pieces of green yarn about 4-5 inches long and added 2 strands to each side of the cone as the pine needles. 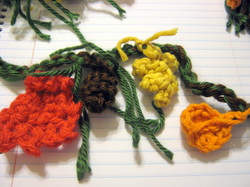 For the Orange leaf I used: http://windrosefiberstudio.blogspot.com/2011/08/veined-leaf-free-crochet-pattern.html I used some simply soft brown and green yarn and made chain to the length I wanted it. Then I went back and spaced out the leaves and cones along the chain in random spots. I crocheted each individually by adding the color of the leaf thru one of the chain loops.
So next time your yarn isn’t quite the right color, give dying it a try. It was fun and I want to dye some more!! Thanks for reading!
P.S. My research sites: http://community.knitpicks.com/notes/Dyeing_-_Tea_Dyeing http://www.youtube.com/watch?v=mIv3R8Vt-Ek 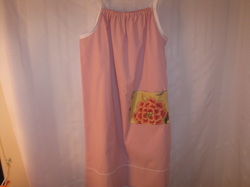 One of the charities we like to donate to is Little Dresses for Africa (littledressesforafrica.org). For Oct - Dec we will be focusing on making as many of these little pillowcase dresses as we can! In addition, we will be having a sale in our store - BOGO - Buy One, Gift One! The dresses will be listed in pairs, you can buy one for your child or a child you know and the other in the set will be sent to the charity. Of course, you can choose to have both sent to the charity as well.  We thought you might be interested in how to make these little dresses. First, take a pillowcase and cut out the arm hole area (not shown and the pattern is at the little dresses site). Next make a casing for the elastic at the neckline. Run the elastic threw the casing which will gather the front and back of the dress to help fit the girl as well as look fashionable. 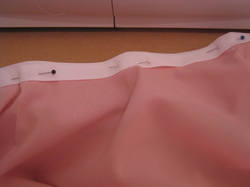 Next step is to put binding along the armhole area and extend the binding out both sides (at the time) as a tie. You can also fold over this edge and sew it down and run the binding for ties thru the neck casing instead of using the elastic. 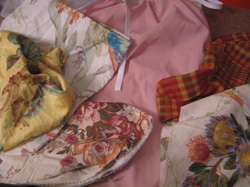 We wanted to dress up our dresses with a pocket so here we were trying to pick out a pair of pockets that would coordinate (we wanted the dresses to look a bit different). We have so many choices from so many pretty fabric scraps thanks to our local scrap exchange (scrapexchange.org). Wonderful place!! 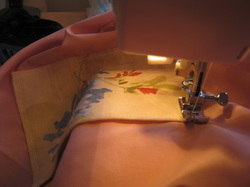 Hem the top of the pocket and then iron down the sides and the bottom of the pocket. Choose where you want the pocket to be and then sew along the sides and bottom. We choose to offset the pocket to one side. The little dresses site asks for minimal additions to the dress due to the fact it will be so hard to replace lace and buttons but they do recommend a pocket! Who doesn't like a pocket? 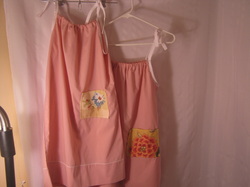 One pair is complete! You can see how nice they look together. We started with a pair of identical pillowcases but as you can see, just by using a different scrap of fabric for the pockets, we have two different outfits! Our hope is that these little dresses will brighten a little girl's day and bring some joy to her life.
If you have any questions, comments or donations, let us know! Thanks for reading! Millie & Kristina http://www.etsy.com/listing/87552379/pillow-case-dress-child-size-buy-1-gift http://www.etsy.com/listing/82506132/pillow-case-dress-child-size-buy-1-gift | Loading
 We are making the move to Word Press with the help of our friend Janine (J9)
 AuthorsMillie and Kristina 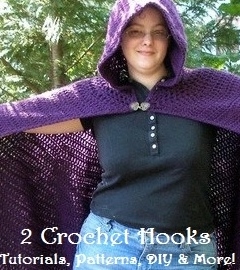
Click here to see all of our free and paid patterns
Click to Enter Thirty One Giveaway
Portion of sales to benefit Hope Animal Rescue!

Click to Enter!

Click to enter!

Click to Enter!
CategoriesAll Awesome Sponsors & Button Swaps
 
 
  Holiday Shopping/
Affiliate Links 
ArchivesNovember 2013  |